ePortfolio (supported) Route
How to sign up for an account on the Centre Portal
Step 1 – Visit the Centre for Advancing Practice Portal
https://advancedpractice.cpdnow.net/
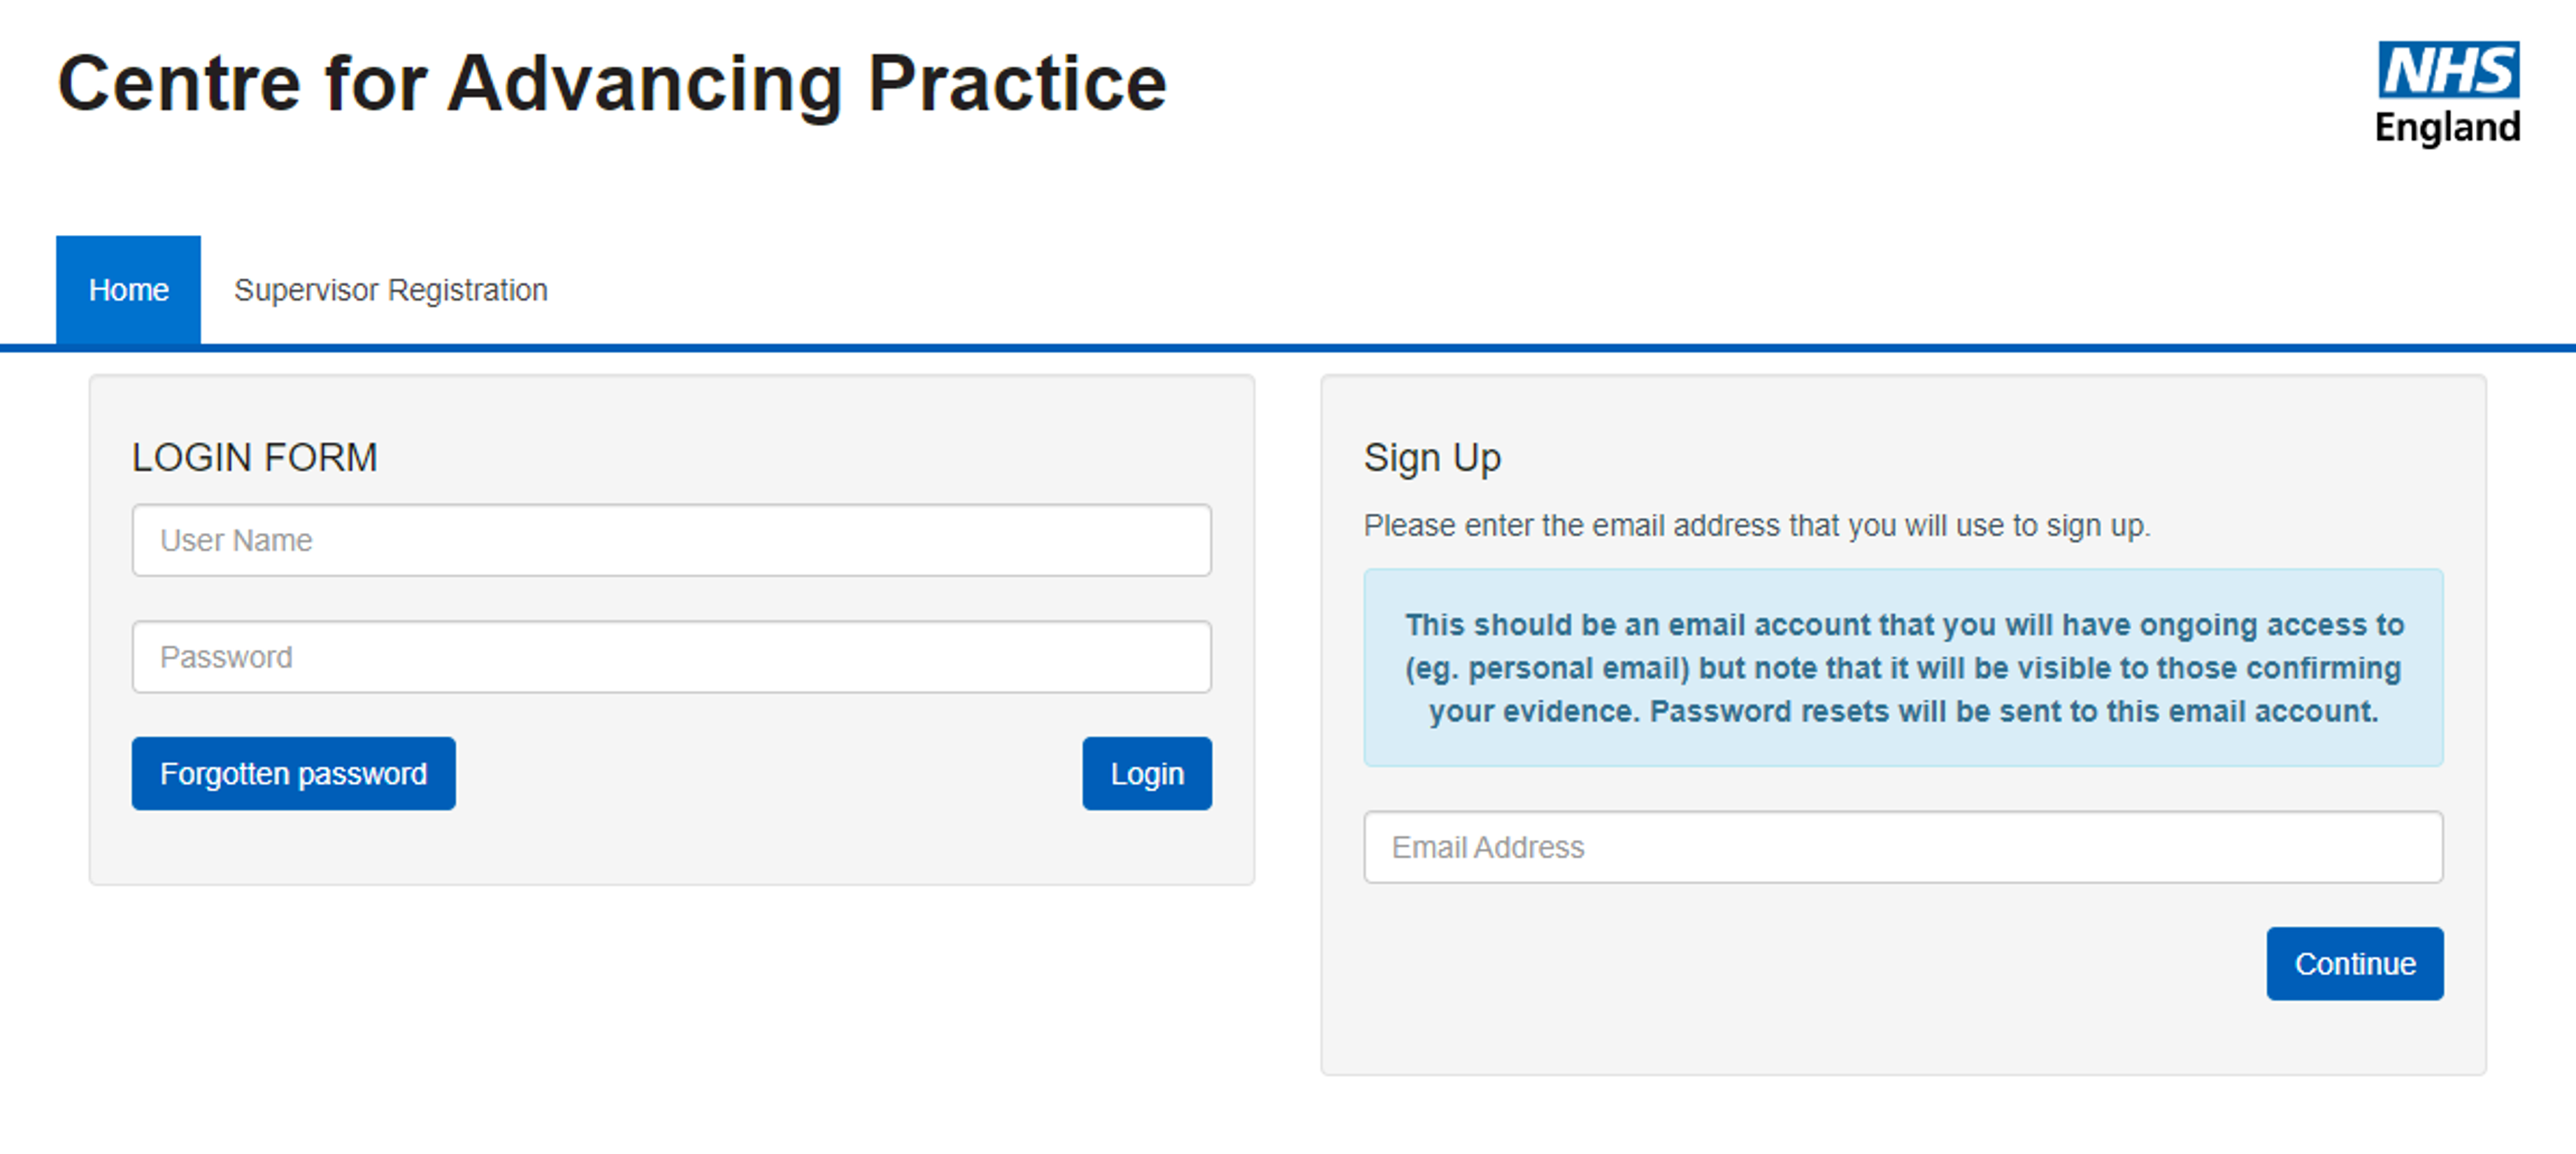
Step 2 – Sign up for an account with the portal by using an email that you will have ongoing access to, then press “Continue”.
Step 3 – Complete the Account Details form and press “Sign Up”
Please note that once signed up will be able to edit these details.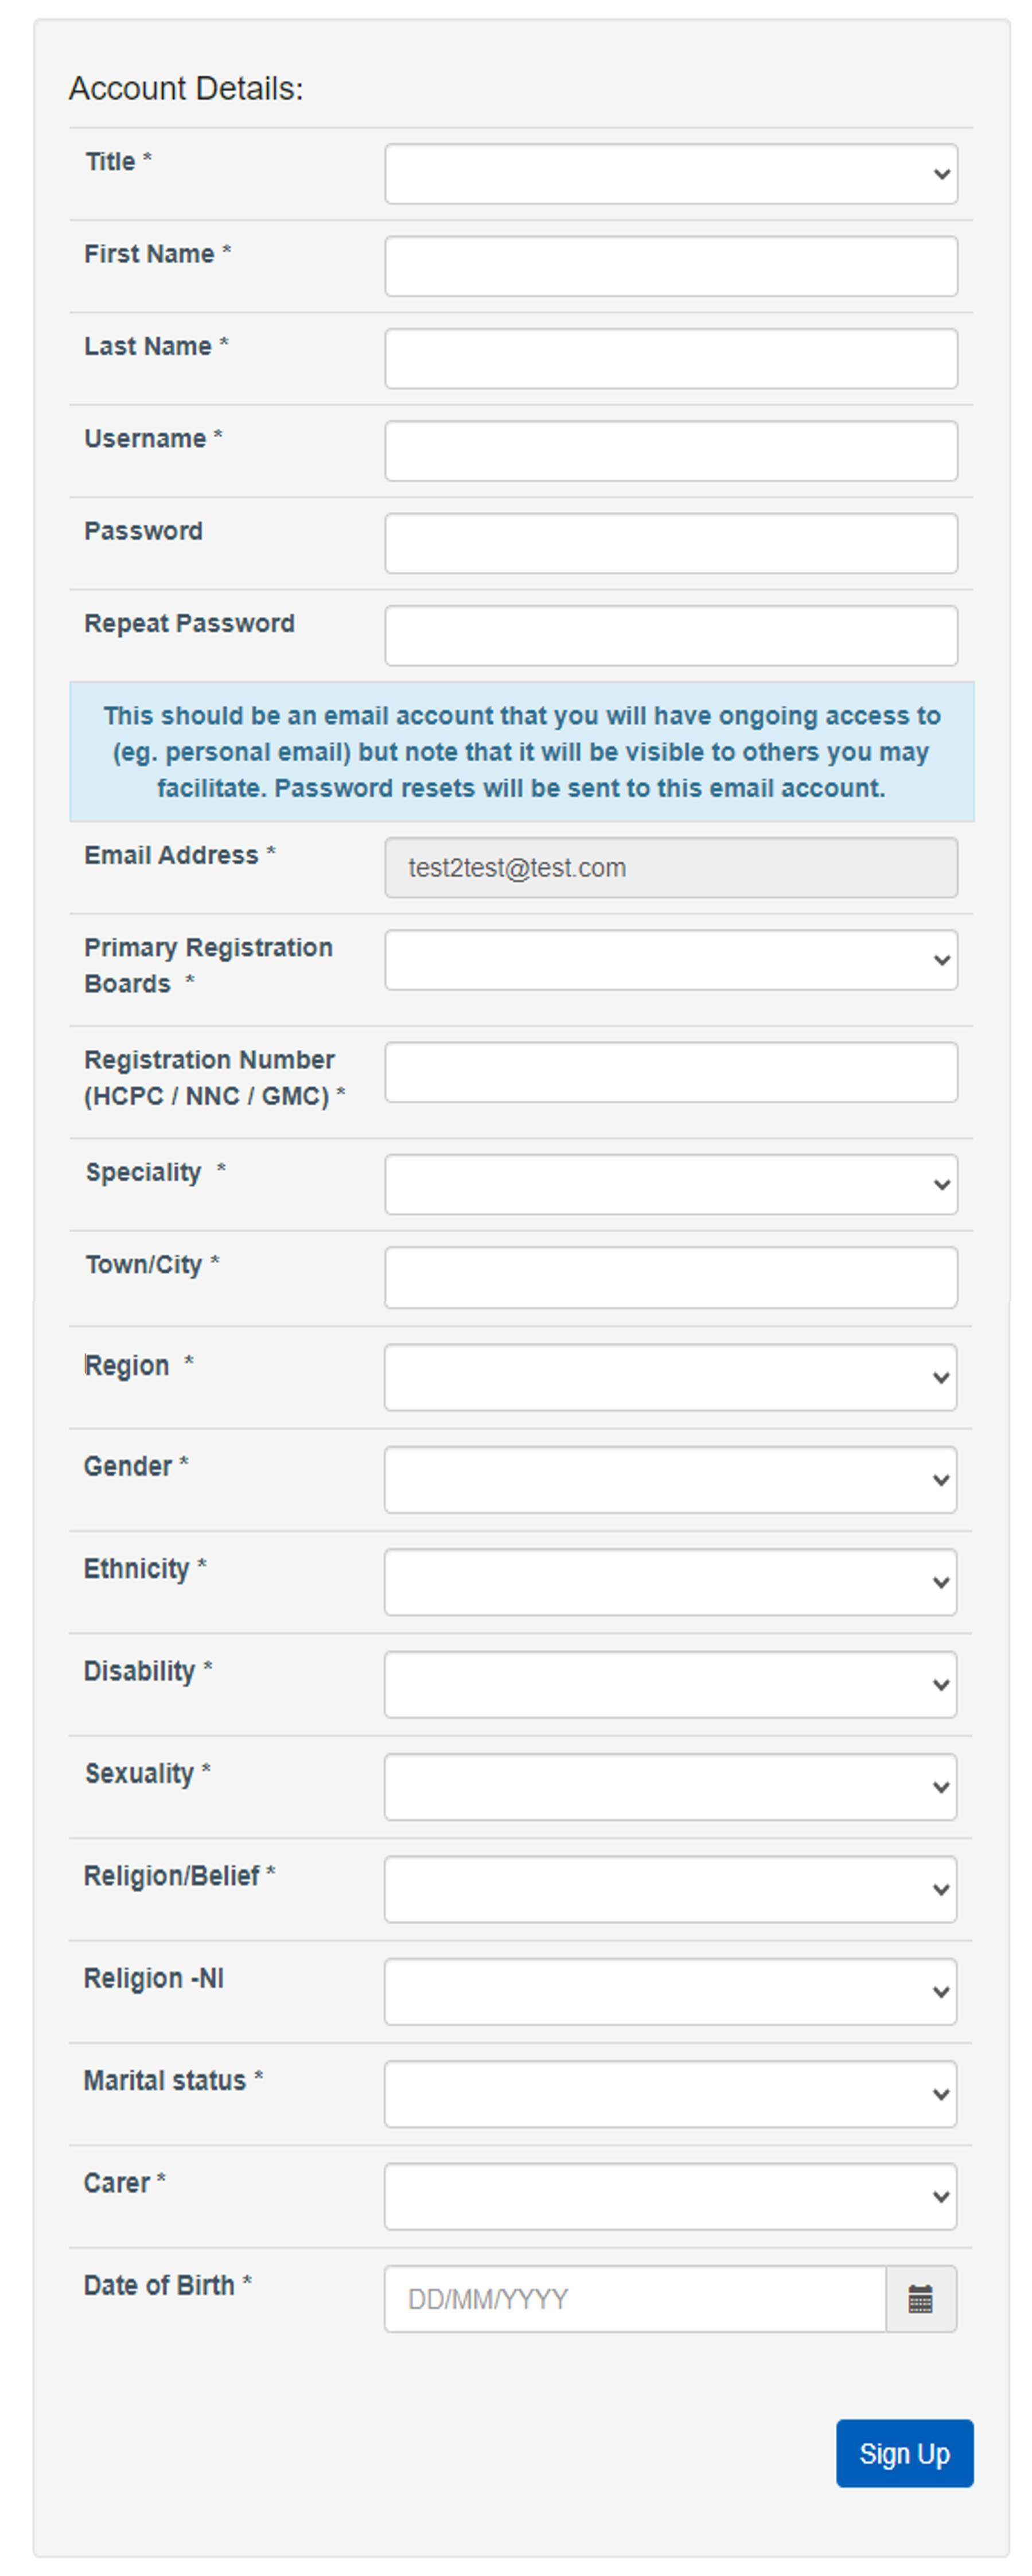
Step 4 – Now you have an account with the Centre for Advancing Practice Portal

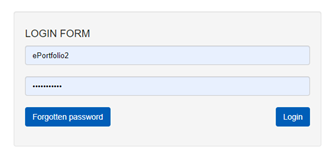
Step 5 – Login to complete account set up.
Add your username and Password and click “Login”

Step 6 – Please read the Terms and Conditions, select check boxes and press “Continue”.
How to complete an “Expression of Interest” for the ePortfolio (Supported) Route
Step 1 – Visit the Centre for Advancing Practice Portal
https://advancedpractice.cpdnow.net/
Step 2 – Log into your account
Please see: How to Sign up for an account on the Centre Portal, if you do not have a Portal account.
Step 3 – Start an application by clicking on the “application and reports” tab

Step 4 – Select your route. For those meet the eligibility criteria ePortfolio (supported) Route, please select “ePortfolio (supported) Route” and press “Start”.

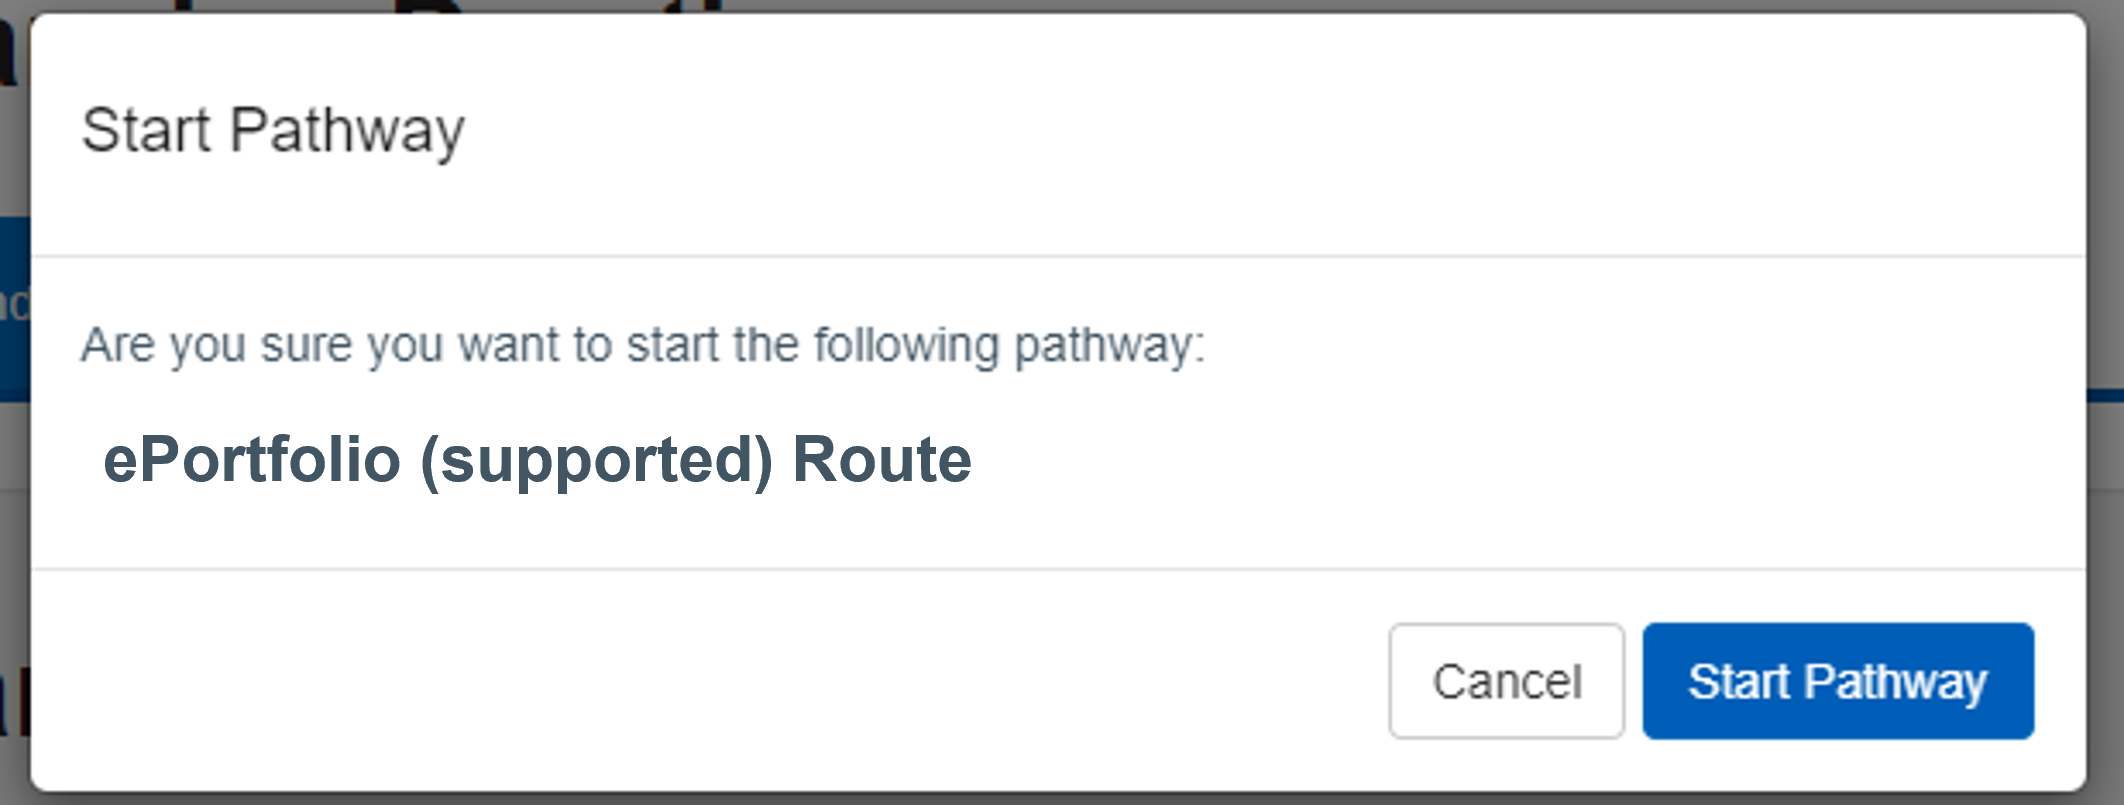
Step 5 – Confirm you want to start the pathway. Select “Start Pathway”.
Step 6 – Complete The Initial Expression of Interest form.
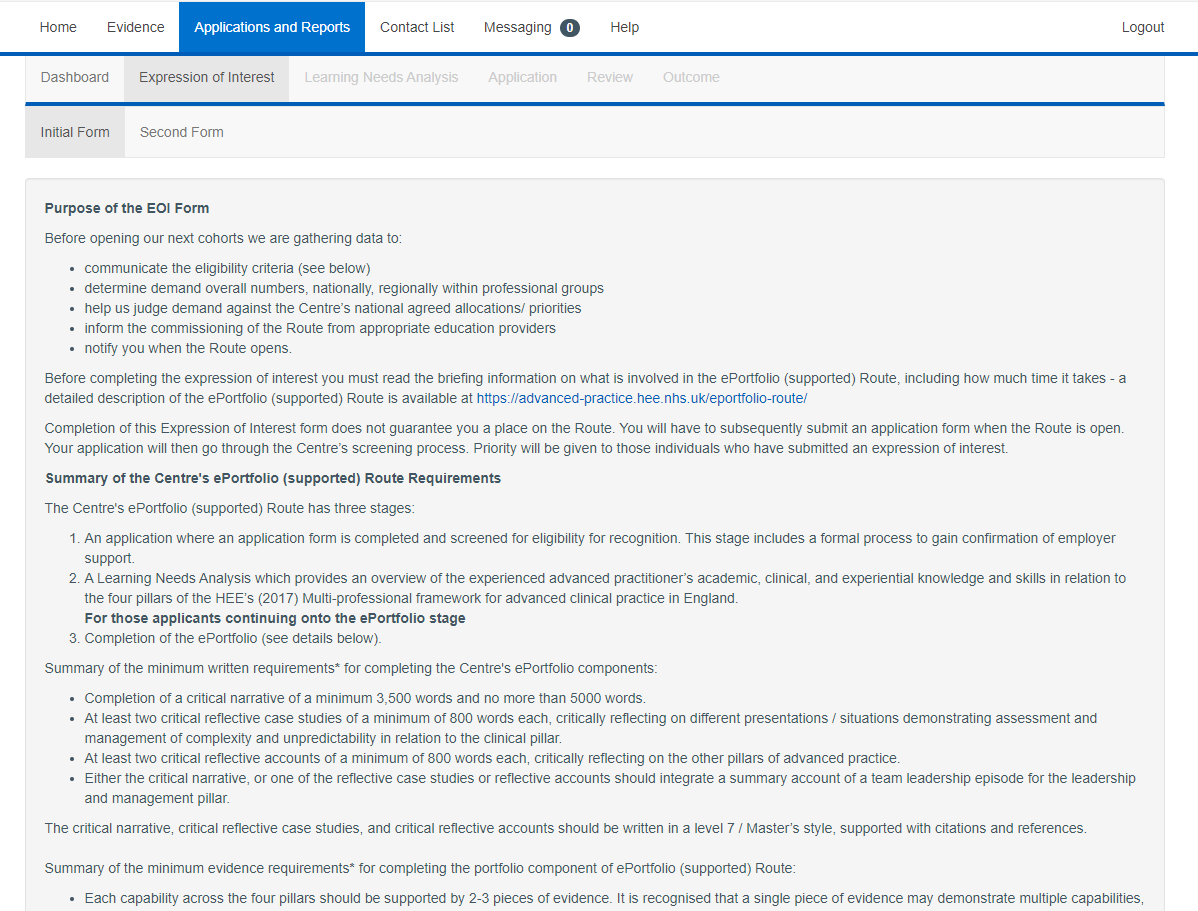
Confirm you have read and understood the requirements.

Please check all your responses, to make sure they are accurate.
And click “Complete and Continue”
Step 7 – Success
Your form has been completed and submitted.

How to complete an application for a cohort for the ePortfolio (Supported) Route
Step 1 – Once you have completed an Expression of Interest form (EOI) you will be invited to apply for a particular cohort.
Step 2 – Once you have received your invitation you should Visit the Centre for Advancing Practice Portal
https://advancedpractice.cpdnow.net/
Step 3 – Log into your account
Please see: How to Sign up for an account on the Centre Portal, if you do not have a Portal account.

Step 4 – Open your “ePortfolio (supported) Route” application by clicking on the “application and reports” tab

Step 5– Select your route “ePortfolio (supported) Route” by selecting “View”.

Step 6 – Open the “Expression of Interest” tab.

Step 7 – Open the Second form, by clicking “Second Form”
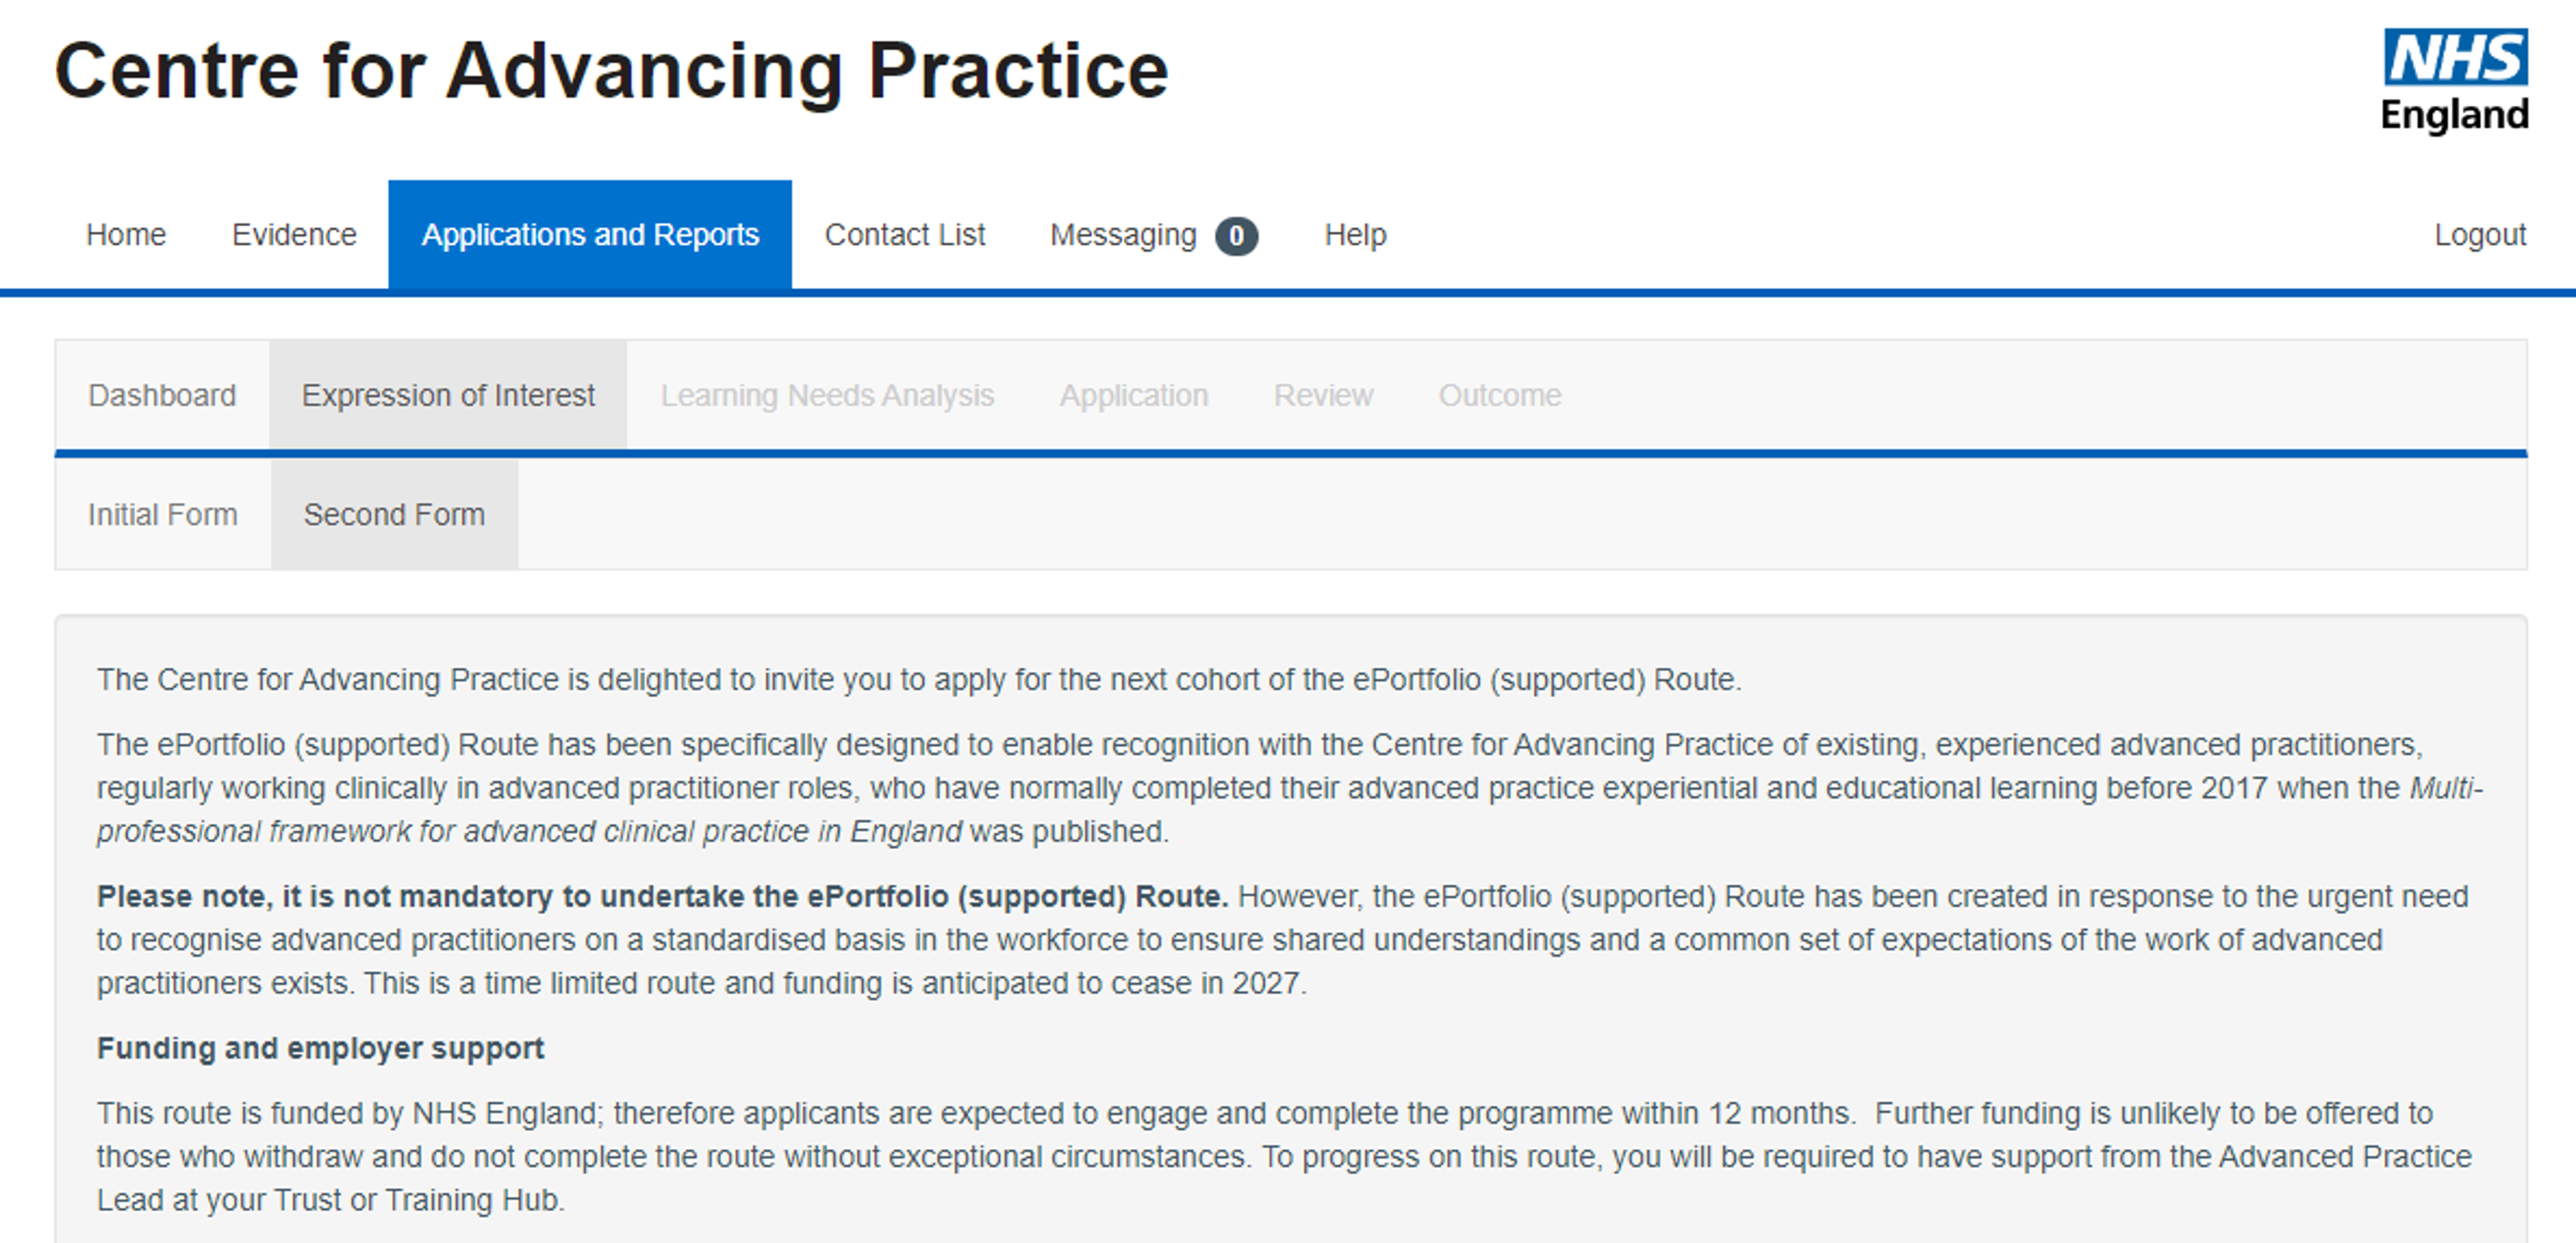
Step 8 – Completed the final part of the application to join the ePortfolio (supported) Route.

Please check all details carefully as decisions for inclusion in the ePortfolio (support) Route will be based on the details provided here.
If any details taken from the initial form are incorrect, please return to and update the initial form.Please note: If you indicate you no longer met the eligibility criteria or you actively withdraw, this will be recorded and a notification will show by the save button.
Step 9 – Add employer details. Confirmation of employer support will be sought directly from your organisation lead for advancing practice or if you are working in a primary care setting your training hub lead. If we are not able to confirm such support your application cannot be progressed.
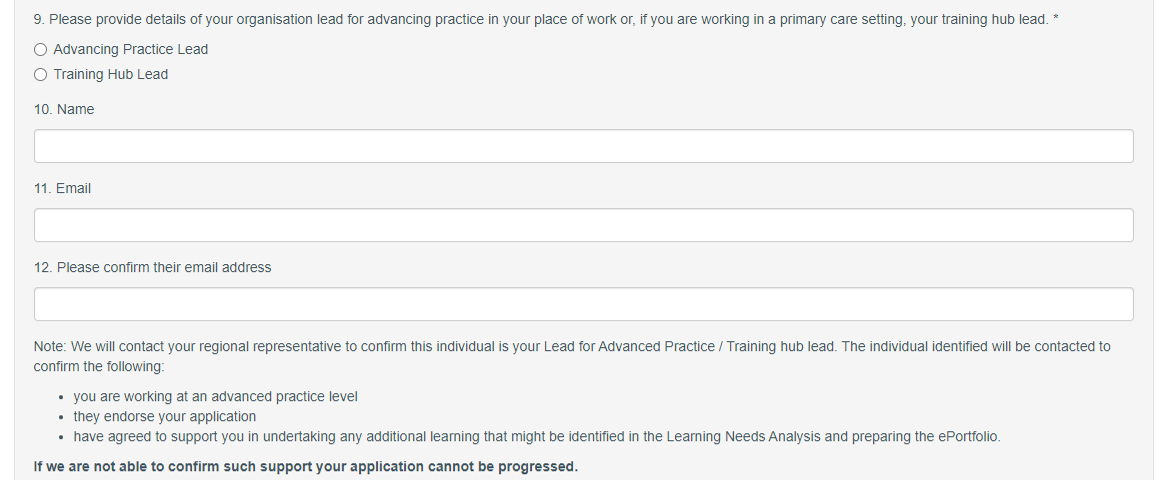
Please make sure you let your organisation lead for advancing practice or training hub lead know that you are applying and confirm with them that they are happy for you to share their email address with the Centre. We strongly recommend that you share the ePortfolio (supported) Route briefing note (available on the Centre for Advancing Practice website) with them before they confirm support for your application.
Step 10 – Complete a final check of all information supplied and complete your declaration. Then press “Save and Complete”.

Step 11 – Success! You have completed the application form for this cohort.

Thank you for completing this application form for the ePortfolio (supported) Route. Once we have received confirmation of support from your organisation lead for advancing practice or training hub lead your application with go through the Centre’s final screening process and we will be in touch to confirm the outcome.
If your application is successful, you will be allocated to an education provider and notified of the start date for the Learning Needs Analysis process. Your details will be shared with your education provider who will subsequently be in touch.
How to Submit an ePortfolio
Step 1: Prepare your ePortfolio.
Prepare your ePortfolio in line with the guidance provided.
ePortfolio (supported) Route Resources
Step 2: Check contents of ePortfolio against check list.
Using the submission checklist ensure you have fully completed your ePortfolio and had all elements required peer reviewed.
Submission Checklist – Advanced Practice Website
Step 3: Prepare to submit for Verification by your educational supervisor.
Once you are ready and assured that you have completed your ePortfolio, do a final check. If the critical narrative is at least 3500 words and your education supervisor agrees you have demonstrated all capabilities a new area will become available at the top of the page.
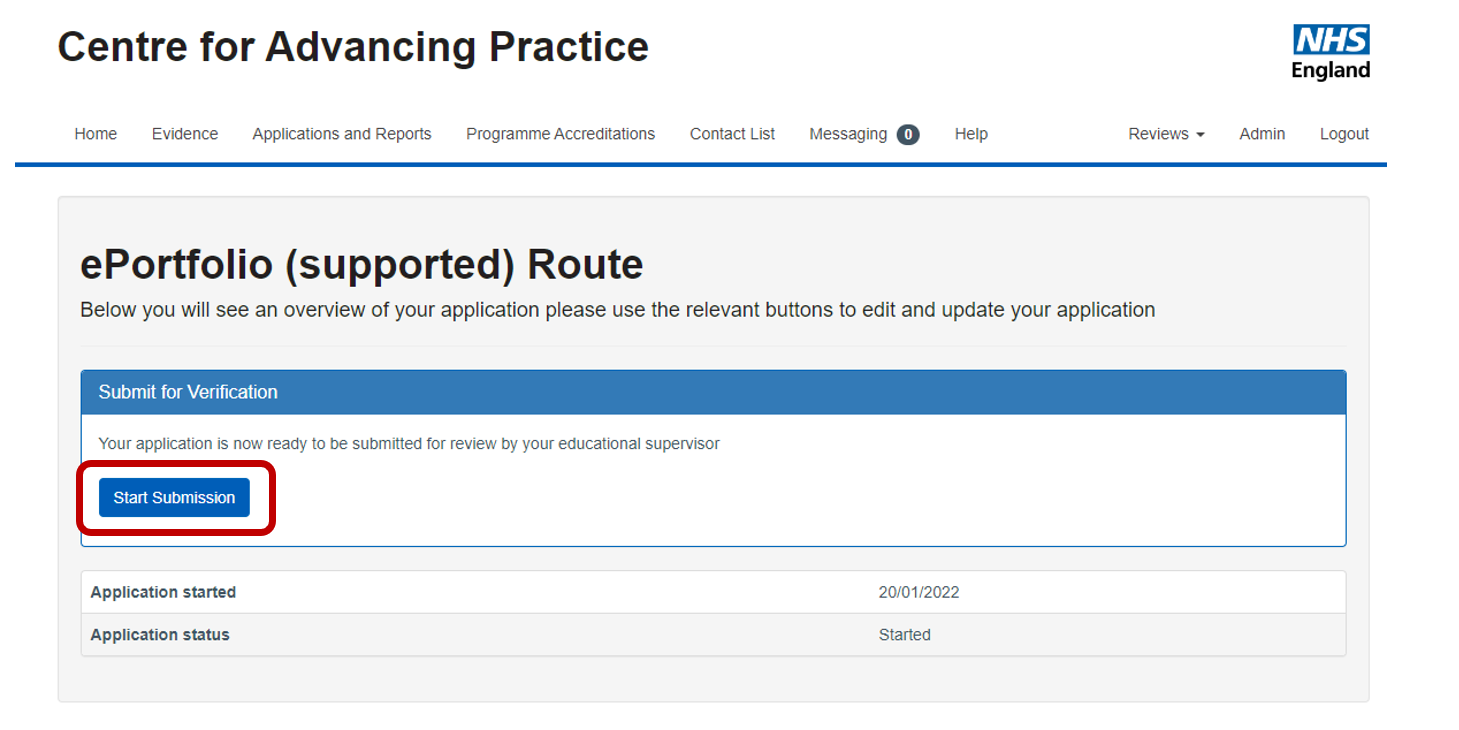
Warning: once submitted your ePortfolio will be locked.
Click “Start Submission”
This start the submission process.
Step 4: Checking all capabilities have evidence against them.
The first part of the submission requires you to check that you have attached? evidence against all of the capabilities.
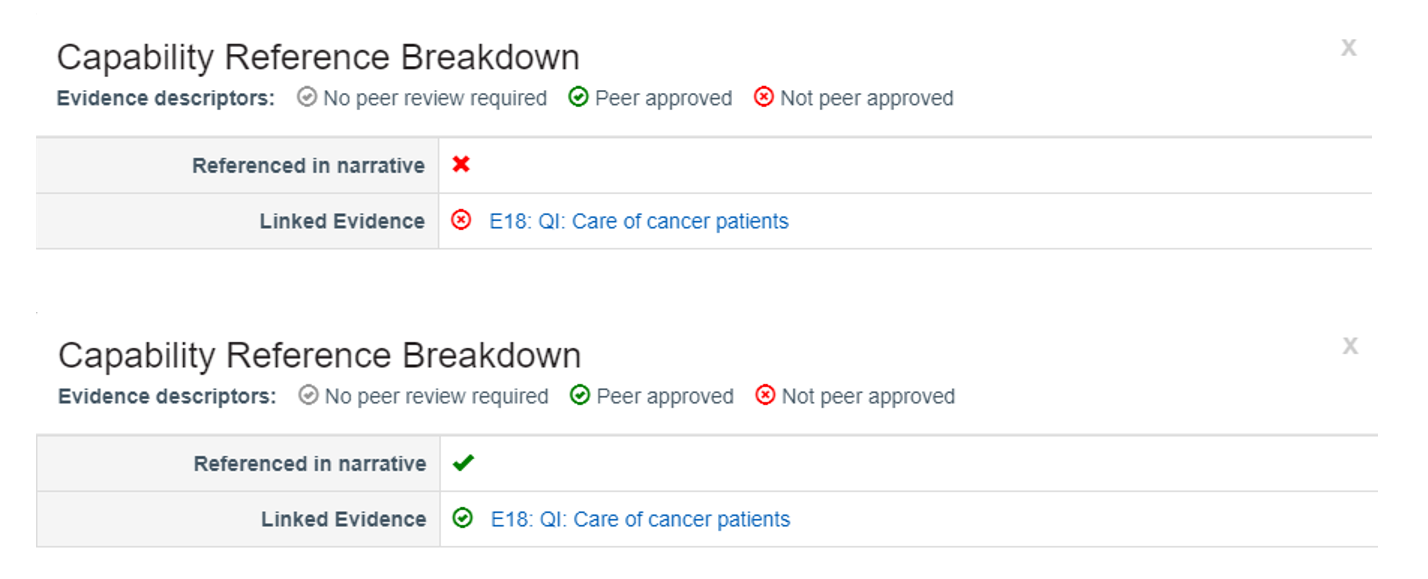
If any capabilities are missing evidence, they will be highlighted red.

You can click on each capability to check status
Once each capability has peer reviewed evidence against it, it will all turn blue. When all are blue you can click “Continue”.
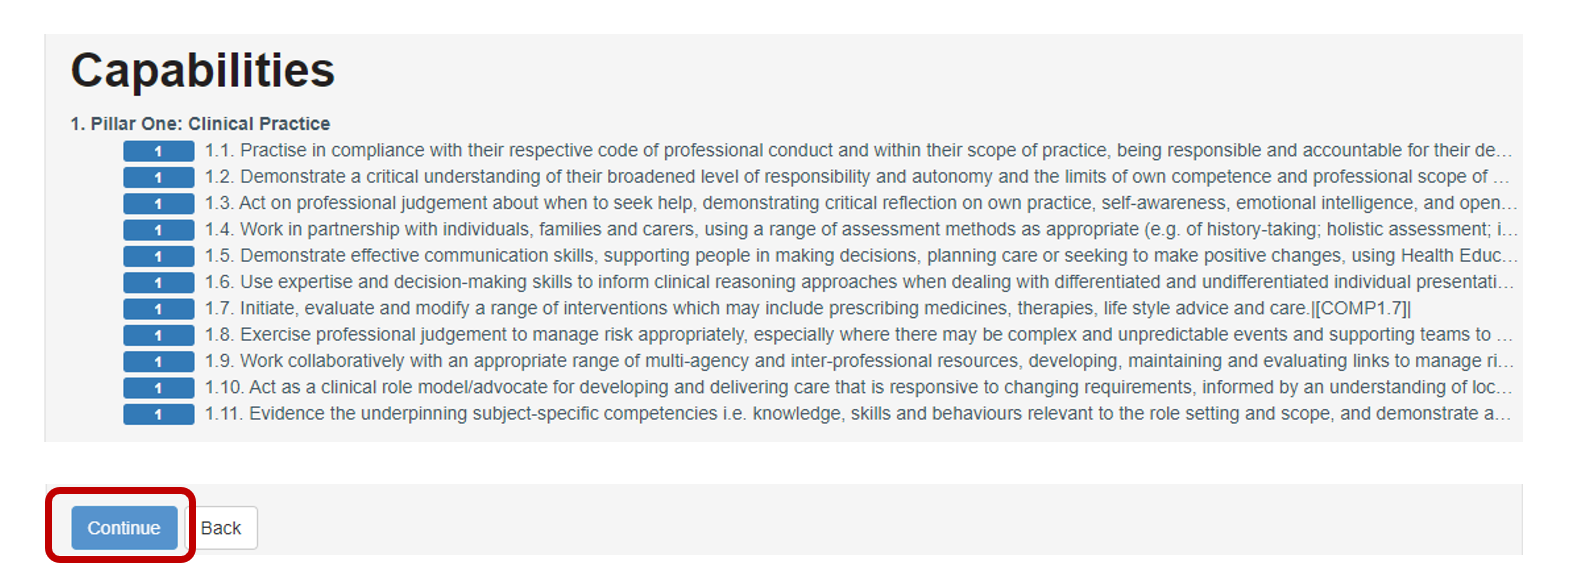
Warning: Quality of evidence is not reviewed at this stage.
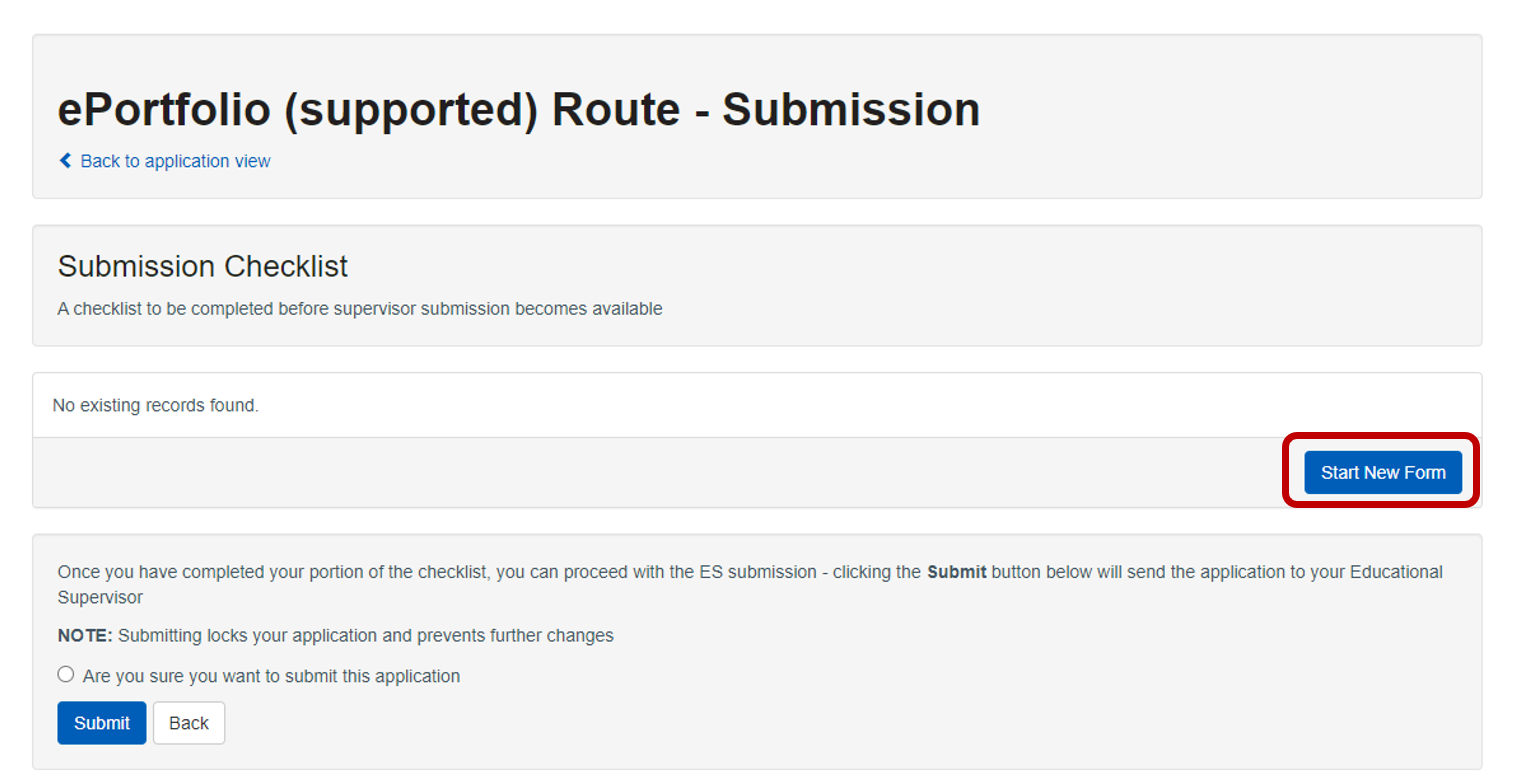
Step 5: Start a new submission checklist.
At this stage you will need to create and complete your submission checklist.
Please note: the submission checklist has not changed; it has just been digitised to support the submission process.
Click “Start” New Form”
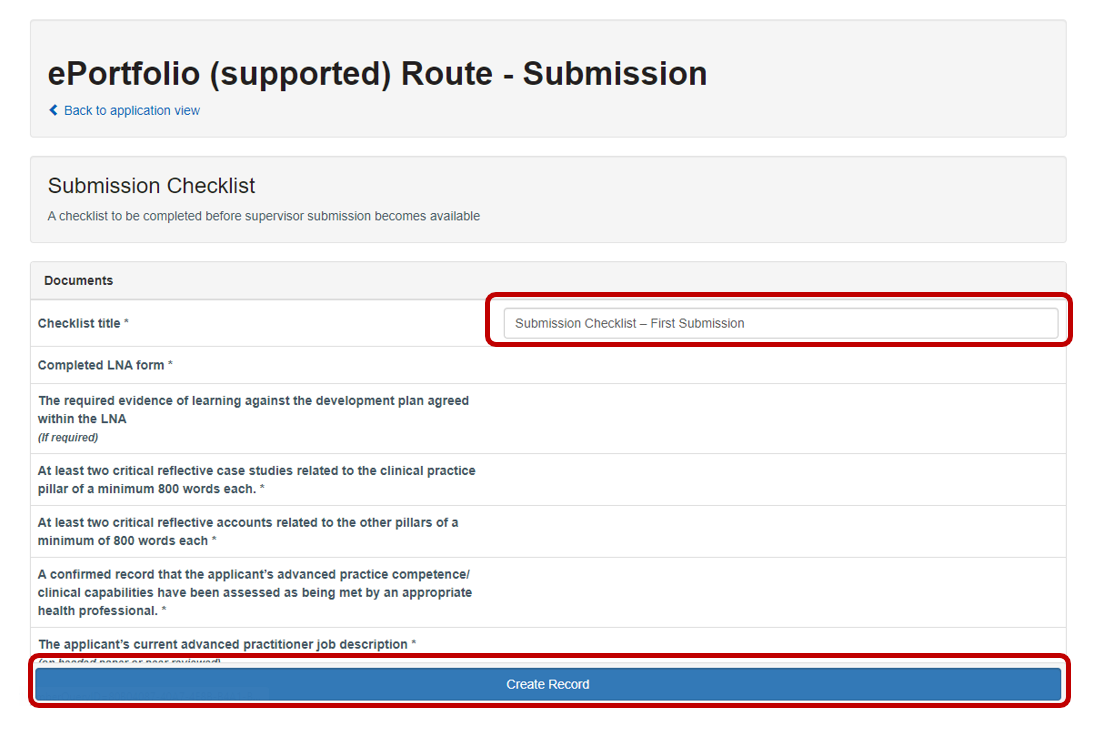
Step 6: Name Submission Checklist
Name the checklist.
- “Submission Checklist – First Submission” for your first submission.
- “Submission Checklist – Second Submission” for first resubmission.
- “Submission Checklist – Third Submission” for second resubmission.
Click “Create Record”
Step 7: Edit your checklist.
Your checklist has now been created. To complete click “Edit”
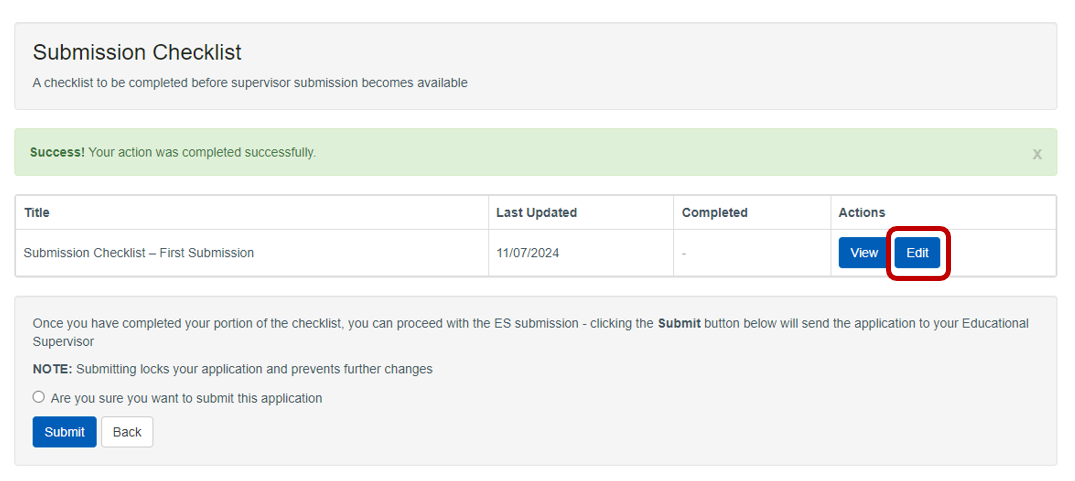
Step 8: Adding essential evidence links.
To complete the submission checklist, you will need to link (insert) your essential pieces of evidence.
Click “Insert Evidence” against each of the elements.
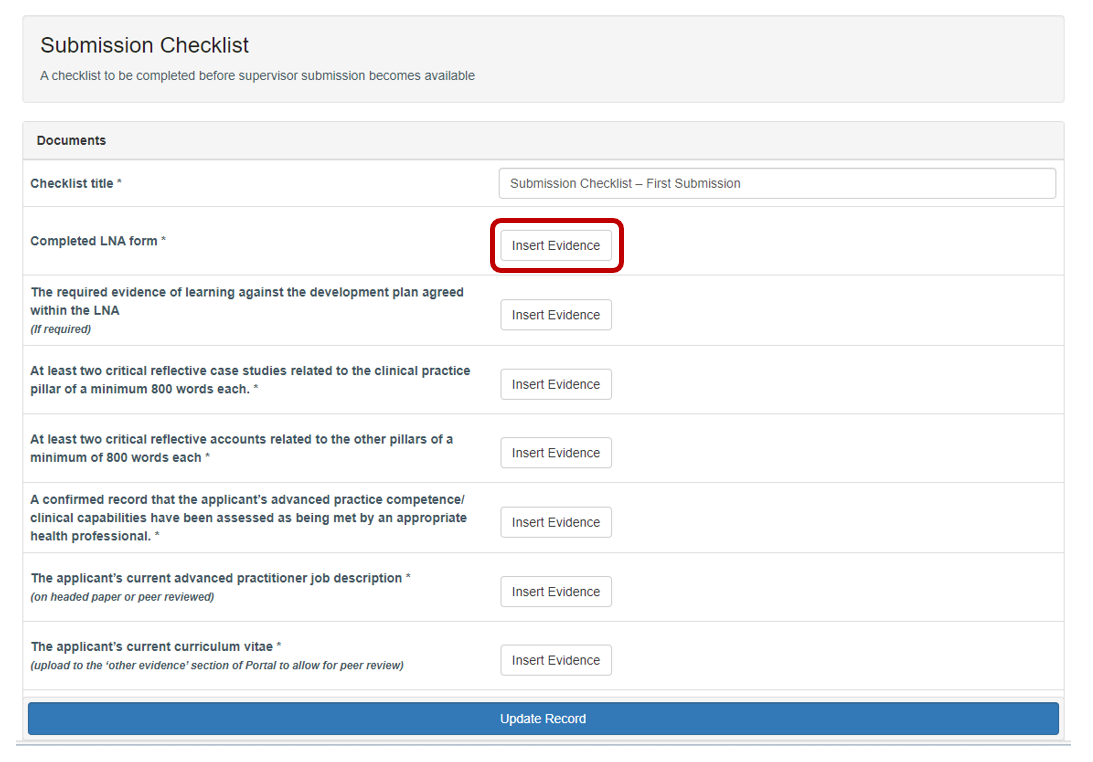
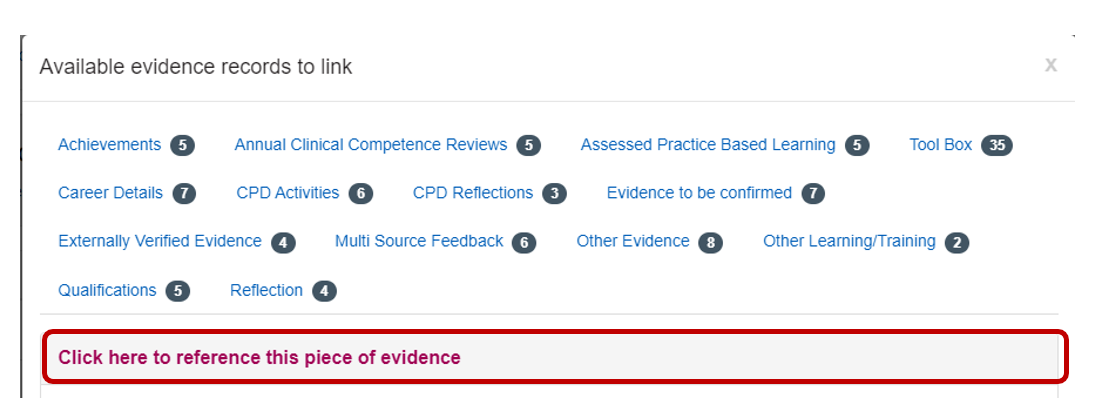
You evidence window will open.
Select the piece of evidence that matches the description.
For example: Completed LNA form* should link directly to your completed LNA Form.
Click on “Click here to reference this piece of evidence”.
You will see the evidence against the description.

Repeat for descriptions and all essential evidence.
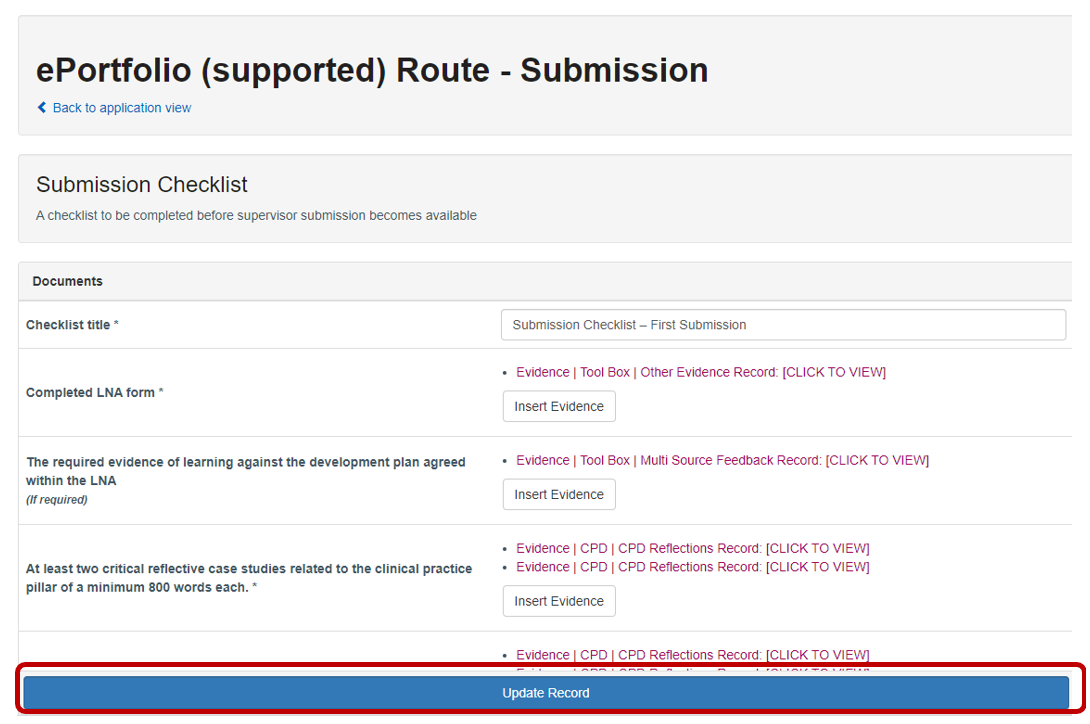
Click “Update Record”
Update Record acts a save progress. This means that you can return to complete the checklist at a later date.
Once fully complete click “Back” or Back to application view.
Step 9: Submitting your application.
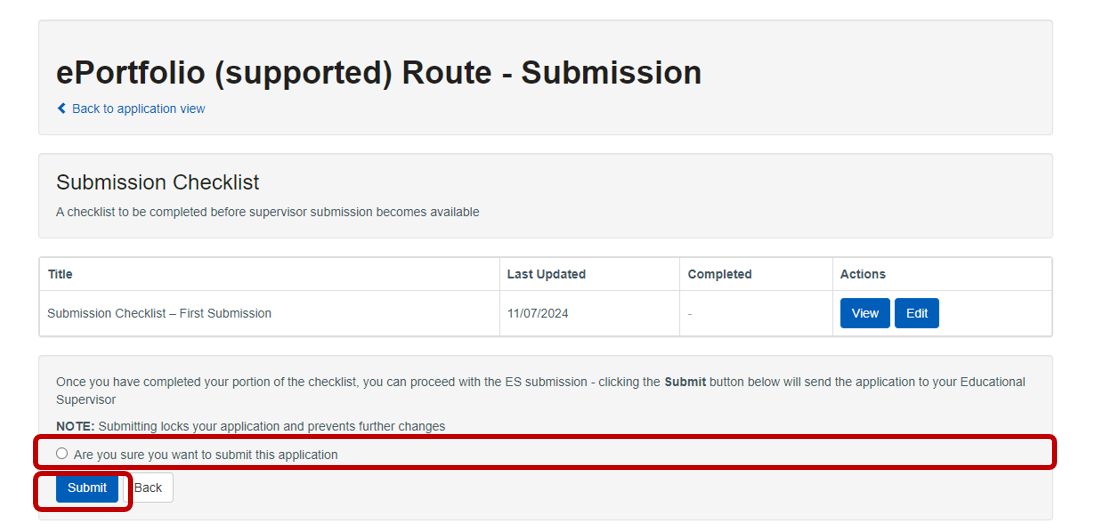
Once you have completed your section of the checklist, you can proceed with the ES submission.
Check that you are sure that you want to submit this application.
Warning: once submitted your ePortfolio will be locked.
Then click “Submit”
This will send the application to your Educational Supervisor
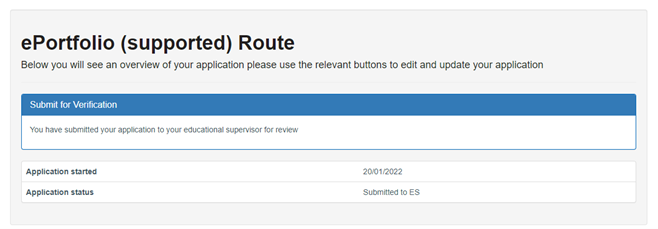
Congratulations you have submitted your ePortfolio to your Educational Supervisor.
Step 10: Checking status of your submission.
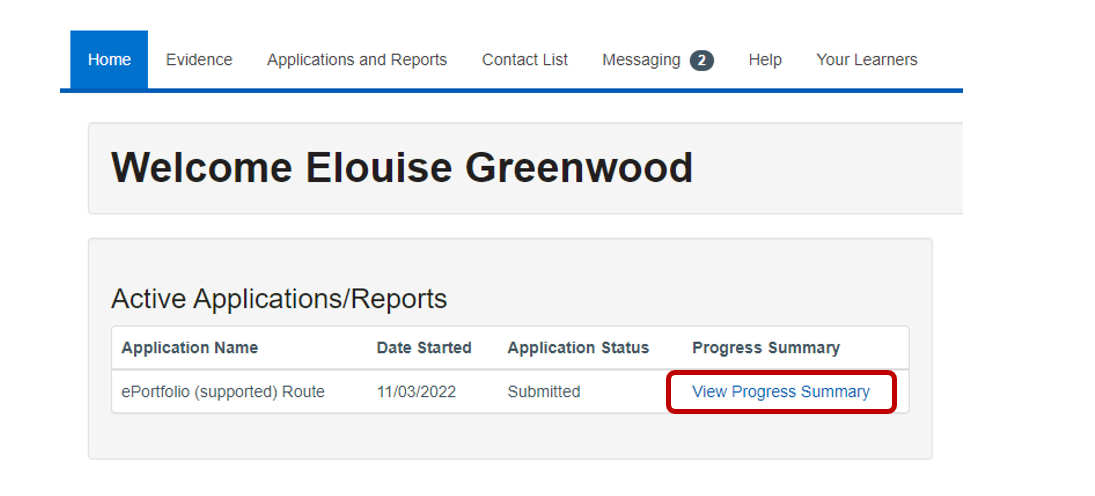
Click “View Progress” Summary”
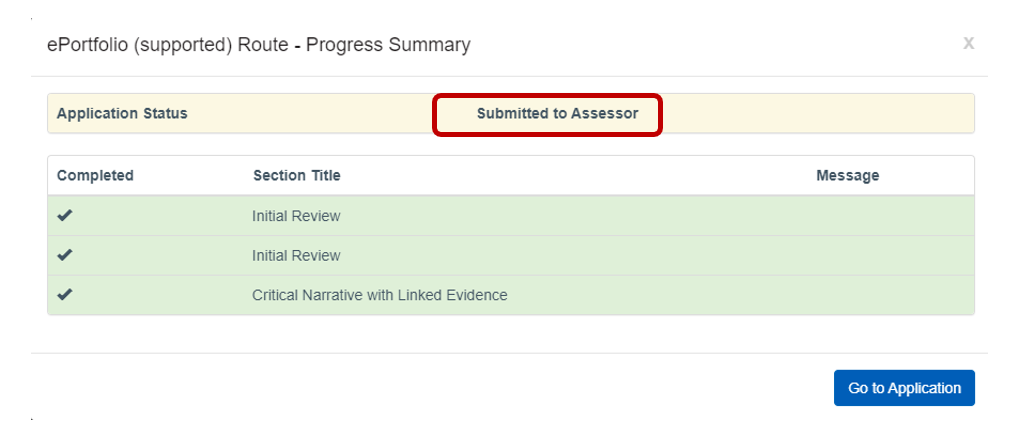
Or under applications

Downloads
How to sign up for an account on the Centre Portal
How to complete an “Expression of Interest” for the ePortfolio (Supported) Route
How to complete an application for a cohort for the ePortfolio (Supported) Route
How to Submit an ePortfolio