The Centre for Advancing Practice has digital badges
Digital badges standardise recognition of the quality assurance of advancing practice education, training, and experience.
The Centre for Advancing Practice offers two routes for practitioners to demonstrate they have met the capabilities outlined in the Multi-professional Framework for Advanced Practice:
- Completion of a Centre for Advancing Practice accredited MSc in Advanced Practice, or
- Successful demonstration of equivalence through the ePortfolio (supported) Route.
Practitioners who complete either route are formally recognised with an “Advanced” digital badge, signifying they have met the required advanced practice capabilities.
The badge does not necessarily confer recognition of skills specific to a scope of practice.
What is a digital badge?
Digital badges are quickly becoming an essential part of the modern learning experience. Badges are web-enabled indicators that can be verified online in real time, allowing practitioners to showcase their abilities in a digital way. Not only do digital badges provide learners with a way to showcase their skills and accomplishments, but they also help employers easily identify qualified candidates for open positions.
Digital badges recognise and celebrate learning or professional development achievements.
Additionally, they offer representation of standardised recognition of the quality assurance of education, training, and experience.
Digital badges are shareable across the internet for maximum visibility and recognition. They are easily shareable and compatible with all of the major platforms searched by employers and educators, such as Facebook, twitter, or LinkedIn. Websites, blogs and digital CVs can have badges directly added.
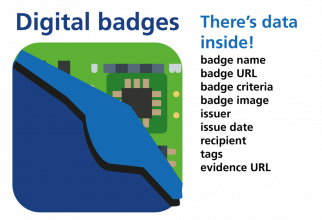
In addition to the image-based design we think of as a digital badge, badges have meta-data to communicate details of the badge to anyone wishing to verify it or learn more about the context of the achievement it signifies. Together these data should provide all the information needed to understand what the badge signifies:
- Who received the badge?
- Who issued the badge?
- What was the criteria for issuing the badge?
- Does it expire?
Some or all of this information is visible in a visual format wherever the badge is displayed however, digital badges also store all of this information in it’s metadata. This means it can be verified any time – even if you only have the image!
Think of a digital badge as not only a line on your CV noting a particular skill or competency, but also visual evidence documenting how that skill was obtained.
How do digital badges work?
A badge is an image with a range of ‘built-in’ information or metadata. The image is the front face of the digital badge.
The metadata is the important bit, the Centre for Advancing Practice adds the following information to the badge.
- the name of the badge
- recipient of the badge
- a description of the badge
- the criteria for earning the badge
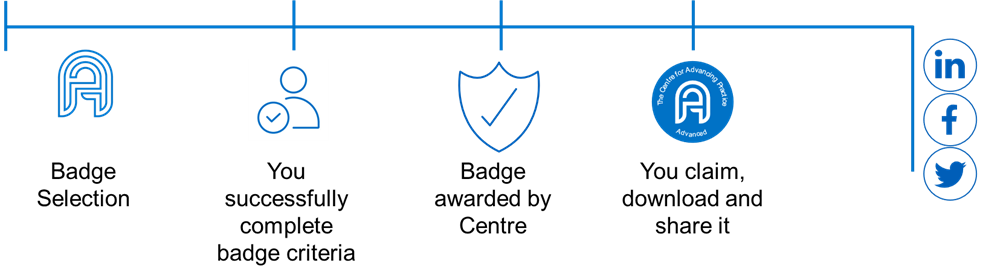
Badges are awarded when the criteria for that particular badge is met. When the criteria for a particular badge it met, the badge can be issued.
An individual may collect badges from different issuers and choose where to store and display these badges. When an individual displays one of their badges, the metadata can be viewed and verified by others simply by clicking on the badge.
I’m a practitioner – How is a badge valuable to me?
Your badge is a digital version of your qualifications and recognised educational equivalency. It allows you to easily show your colleagues, friends, or potential employers:
- When you earned the certification or education equivalency
- The framework the badge is based on
- What it takes to be eligible for the badge
Your badge allows you to easily manage, share (online), and verify your certification(s) and/or educational equivalency. This includes real-time authentication.
Badges provide employers and peers concrete evidence of what you had to do to earn your certification(s) or educational equivalency.
Badges can be shared in your email signature, on your electronic résumé, and on online (LinkedIn, Facebook, and Twitter) profiles.
Benefits for….
practitioners
- Make your achievements, a permanent, verifiable part of your online profile.
- Share your achievements with online friends and social media followers.
- Easily adding your badge to an email signature, CV, website and more.
- Embed your badge on a personal website or blog.
- Send or show your badge directly to a colleague, a recruiter, or your employer.
- Recognisable and transferable qualifications.
- More consistent recognition of people working at an advanced level of practice.
- Help raise the profile of Advanced Practitioners.
employers
- Checkable standardisation of recognition of quality assurance education, training and experience as an advanced practitioner.
- Easier to identify advanced practitioners with quality assured qualifications or educational equivalence and experience for posts, including those already employed and applicants for new posts.
- Support governance and quality assurance.
- Recognisable and transferable qualifications that enable a fully utilised workforce.
- More consistent recognition of people working at an advanced level of practice.
patients, carers and families
- Checkable standardisation of recognition of the quality assured preparation of advanced practitioners.
- Provides assurance that their practitioner has received advanced practice level training / education.
- Makes it easy to check the educational level of advanced practitioners.
- Enables increased awareness and understanding of advanced practitioner roles.